Sometimes when I am trying to spark an idea, I just start weaving bases. Sometimes that sparks lots of ideas, sometimes just one idea, and sometimes just lots of bases on my weaving table! While I was weaving bases today I thought you all might like to talk about them.
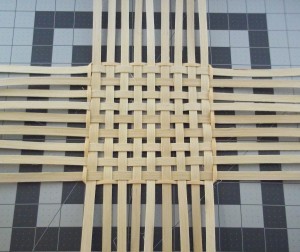
Let’s start with the basic plaited base. It can be made with or without fillers and is a great base for a market basket or a storage basket.
This base is woven with 3/8″ FF* stakes, they are spaced about 7mm apart. Its basic over one under one weaving is strong, traditional, and classic. I love the look of this base; I use it in the laundry basket in my Seagrass Laundry Collection and in my Newspaper Basket.
Because I prefer a filled or closed base, the bases I make most often are filled in some way. There are several ways to create a filled base, but a basic plaited base can easily be filled by adding fillers that are a little narrower and a little shorter than the stakes. To determine the size of the fillers you need two measurements:
- The spacing that the pattern allows between the stakes – this number will be the width of your fillers.
- The length of the basket – this number plus six inches will be the length of your fillers.
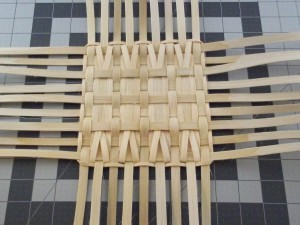
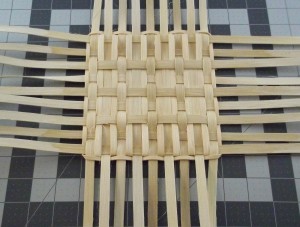
The samples below have 3/8″ FF stakes and 7mm FF fillers. The fillers are woven tight to the vertical stakes, and the horizontal stakes are spaced about 7mm apart. The first two samples have the fillers woven in alongside the vertical stakes following the course of every other stake.
There are a couple of ways to end the fillers. You can cut the filler in half length wise and make ‘crow’s feet’ (also called chicken’s feet) that tuck under the second horizontal stake. You can take two separate fillers and make crow’s feet like in the photo above. I use crow’s feet to end my fillers in my Ichnolite basket and the Grandma and Me Totes.
OR you can just fold the fillers to the inside or the outside of the basket and tuck them under the second horizontal stake. The drawer baskets in my Seagrass Laundry Collection use this technique to end the fillers.
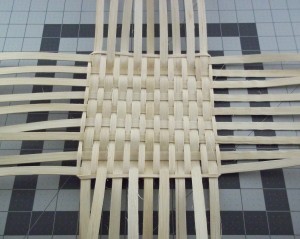
Fillers can also be added to a base and woven individually. These fillers are also woven tight to the vertical stakes. Fillers can be ended as shown in the photo below (folded over and tucked under the second stake) or ended as crow’s feet.
Candace Katz, from Bases to Weave, has created this wonderful video tutorial “Rectangle Base Technique“; in the video Candace is weaving a base similar to the one above. (While you are visiting Bases to Weave, be sure to check out their other helpful tutorials.)
All of the bases pictured in this article are locked with a length of 11/64” FF, which is woven around the base one time. The corners are mitered and the ends have a four stake overlap to hide the ends.
When weaving a square or rectangular base, it is important to keep your spaces even, your vertical stakes parallel, your horizontal stakes parallel and your corners square (90 degrees). Before you lock the base, take the time to square up your base: be sure that the top and bottom are the same length, the left and right side and the same height and the diagonals (bottom left to top right and bottom right to top left) have the same measurement. Taking the time to square up your base will give you a nicer basket.
I have another base in process … but I’ll save it for another time.
* FF = Flat Flat, which means that the reed is flat on both sides
link to Bases to Weave videos: http://www.basestoweave.com/VideosShow.html


Leave a Reply
Want to join the discussion?Feel free to contribute!